One of my favorite things to do is scope out new products at the drugstore- if you haven't noticed yet! However, lately all my drugstore have been displaying holiday gift bags and boxes so I didn't really notice any new displays. Then I went to Harmon (my local beauty store) and woah baby! I found a couple new products, but I wanted to focus on the Rimmel Scandal Eyes Shadow Paint first.
This product claims to be a long wear liquid eye shadow that lasts all day, and I got it in the shade Chestnut Taupe. This is a taupe shade that leans more towards purple (it is more purple than the swatch shows). On the left you can see the "paint" a little more sheered out and the right is a full on swatch.
This has a pretty thin consistency and does blend easily. It takes a minute to set and after that won't budge. This can definitely be layered to create a deeper or more subtle effect. As you can somewhat see in the swatch, this product is super metallic and shines.
There are quite a few shades in this line, but I was attracted to this one the most. I did see some highlight-like colors but I don't really like to put these types of products in my inner rim, as they tend to make that area a bit itchy. I would definitely check these out if they are displayed at your drugstore! I kind of see these as the more liquid version of the Maybelline Eye Studio Color Tattoos- both great additions to any collection!
So this was just my head's up to you about a new product I found. Look for more of these coming soon because I have noticed a lot of new collections coming out recently. Let me know if you have tried any of the other shades in this line and which are your favorites!
Always stay happy and healthy! :)
Tschüss, Katharina
Sunday, December 29, 2013
Friday, December 27, 2013
the 5: a quick smokey eye
One thing I love doing is challenging myself, especially in the realm of makeup. I have gone from never wearing eyeshadow to switching up my eye look every day, and it's so fun! Something I really wanted to tackle is how to create a smokey eye including eyebrows using only five products...and I have triumphed and lived to talk about it! So without further ado, let me get started on what you need for this look!
First, I would suggest some kind primer and in this case I chose the Maybelline Eye Studio Color Tattoo in Bad to the Bronze (swatched top, left). This product, specifically, will not only keep your shadows from creasing but also provide you with a bit of color on the lid. The next product, which also happens to be the star of this tutorial, is the Maybelline Expert Wear Eyeshadow Quad in Natural Smokes (swatched in the order they will be used). This is a great, very universal quad with two shimmery and two matte shades that is practically necessary in anyone's makeup collection. You will also need a blending brush, and mine happens to be the Coastal Scents Classic Blender Natural- so very affordable! You will also need a brow pencil or powder to fill in your brows and the one I use is the Anastasia Beverly Hills Perfect Brow Pencil in Medium Brown. And finally, you will need a mascara, of course! I use the L'Oreal Double Extend Carbon Black Mascara because it includes both the primer and black mascara to give you beautiful, thick lashes. Okay, so now that we have gone through what we need, let's get on with the pictorial!
Start off with a clean eye and apply the Maybelline Eye Studio Color Tattoo in Bad to the Bronze all over the lid and also the lower lash line. You do not want to take this past your crease. Then use the taupe shade (top left) from the Maybelline Expert Wear Eyeshadow Quad in Natural Smokes and apply that all over the lid using the applicator provided in the palette.
Using that same applicator, take the bronze shade (below the taupe shade) from the quad and pat that into the outer corner taking it a bit into the crease and also on the lower lash line. Now it's time to blend, so using the Coastal Scents Classic Blender Natural I blended the crease out and also the lower lash line a bit. Now use your fingers to get a concentrated application of the cream shade from the quad and place that in the inner corner and under the brow bone.
Again using the tip of the applicator provided in the quad, take the deep matte brown and apply it as a liner. Obviously you can use a liquid or gel liner if you prefer, but I think lining the lash line with shadow makes it more wearable during the day. I then filled in my brows using the Anastasia Beverly Hills Perfect Brow Pencil in Medium Brown and finished off the look by applying the L'Oreal Double Extend Carbon Black Mascara.
This look is affordable and with some practice can become quite easy and not very time consuming! It's also very versatile, as it can be worn during the day or deepened a little for a night out! I hope you enjoyed this look and I wish you success in recreating it.
Also, I hope you all had a lovely Christmas and got everything you wished for! And if you don't celebrate, well then I hope you had a great day :D
Always stay happy and healthy! :) Tschüss, Katharina
Monday, December 23, 2013
Glam bag update: part 3
It is time to update you on the final batch of Glam bags, which includes the months of October, November and December. Like in the other ones (check out part 1 and part 2) I will only mention the products I really enjoyed, unless I didn't really have any favorites. I do plan on doing a "top Glam bag products" and "Glam bag fails"- possibly by different names- so look out for that soon! Now let's get started with October.
October 2013 Glam bag
Products I liked:
Always stay happy and healthy! :) Tschüss, Katharina
October 2013 Glam bag
Products I liked:
- Zoya Nail Polish in Mason- I love the formula of Zoya polishes and the color is beautiful, as well. It is a great metallic cranberry magenta and looks perfect for fall and winter.
- Buxom Full-On Lip Polish in Dolly- this berry mauve with golden shimmer is the perfect natural shade with a kick to it! It tingles and applies so smoothly, giving you luscious pouty lips. I have really enjoyed this gloss!
November 2013 Glam bag
Products I liked:
- Starlooks Gem Eye Pencil in Amethyst- this silvery lilac pencil liner makes an amazing glittery base. I like layering shadow over it because it tones down the shimmer a bit, but still allows it to peek through. I did do a look with it but the pictures weren't really showing the beauty of the pencil...so annoying.
- pixi Beauty Bronzer in Subtly Suntouched- I didn't speak too highly of this product at first, but I decided to use it as a contour and surprisingly it worked great. I use this on days when I want a subtle contour because it is so light, and no, the shimmer does not show.
- HSI Professional Argan Oil Leave-In Hair Treatment- this is so nice. It is a hair oil that leaves my hair feeling silky and healthy. I use this on my wet hair, but it would also be lovely to tame any flyaways and frizzies.
December 2013 Glam bag
- I wasn't super crazy about any product this month. I have yet to try the Andrea Strip Lashes in 33 but I have no doubt they will look gorgeous. The pop Beauty Bright Up Your Life Eye Shadow Trio in Smokin' Hot is nice and pretty pigmented but they aren't shades I really find myself reaching for that often.
So that's my update on how I felt about the Glam bag products. Let me know what your favorites were for the months of October, November and December- I'd love to know! Have a lovely Christmas Eve and Day, I hope you get everything you wished for and that you can see all your favorite relatives and friends! Love you all :)
Always stay happy and healthy! :) Tschüss, Katharina
Wednesday, December 18, 2013
Stila kitten set
I remember trying a sample of the Stila In the Light Palette, click here for an impression on that, and really enjoying the shade Kitten. Well I appeared not to be the only one, because Stila came out with a whole range of products modeled around the Kitten shade. One of my favorite things to do on Sephora.com and Ulta.com is to look at the sale section...and what did I see? A kit that had some of the Kitten-colored products, and at $25, I thought it was a steal! So of course my inner makeup junkie coerced me to get it.
So the kit comes in this cute little tin (I took the plastic insert out and put some extra mascaras in there). You end up getting four full sized products, Eye Shadow, All Over Shimmer Duo, Silk Shimmer Luxe Gloss and Lip Glaze- all, of course, in the shade Kitten.
Starting off with the eyeshadow, this is a beautiful champagne shade with lots of shimmer. I have so many of these but none seem to be exactly like this one. It really just opens up the eye and provides the most beautiful hint of glow. The eyeshadow itself has a pretty creamy texture and is very pigmented. One of my favorite things to do with the shadow (besides highlight the inner corner and under the brow) is to tap it in the center of my lid after my eye look is completed- it really is such a lovely effect!
Next to that is the All Over Shimmer Duo which comes with a sort of watered down version of Kitten and a bit of a deeper more bronze version of Kitten. Both are shimmery and feel like the eyeshadow. These both provide such a glowing effect on the top of the cheekbones.
The final two products are the gloss and lip glaze. The gloss is very thick and I feel is meant more to highlight the lips over another lip product. It doesn't have very much color on its own but provides a lot of shimmer, not in a tacky way though. Even though there are visible glitter particles, it really doesn't show up that way on the lips. As for the gloss, this is a bit more pigmented (even than the picture lets on). It is kind of a bronzy nude, again, with those glitter particles that do not really show up on the lips. This also has a pretty thick consistency, but I wouldn't consider either of them uncomfortable. I think they are a bit sticky, but nothing too terrible.
If you like this shade but don't feel like dishing out the $18 for the single shadow, I really encourage you to get this kit (click here). I do see myself using some of these products more often, i.e. the shadow and highlight, but in the end it is worth it to me! Let me know if you own this shadow and what's your favorite way to wear it!
Always stay happy and healthy! :) Tschüss, Katharina
Monday, December 16, 2013
December 2013 Glam bag
Already time for another Glam bag- I can't believe it...but I love it! So as you may know, I was so excited last month for what I was going to get and then I was kind of let down, so I tried not to have any expectations for December. And I guess that paid off, because I was actually very happy and surprised with this month's products!
Okay, first I want to talk about the bag. I just adore it! It's so cute and black (I love black) with a kind of quilted diamond pattern. The inside is blood red, making it that much more beautiful- maybe ipsy heard my complaints from last month and decided to step it up a notch. Now let's get to the products.
The first pictured product is the Be a Bombshell The One Stick in Flustered. I think this is supposed to be a product you can use on your lips and cheeks, and I got a red shade. This has a very creamy texture and seems to be very thin. I think this would be a beautiful blush color when blended out- I will definitely mention this in another post!
Next is the pop Beauty Bright Up Your Life Eye Shadow Trio in Smokin' Hot. I would consider this a classic smokey eye palette because it provides you with a very light silvery shade, a medium silver grey and a deep, almost black charcoal. All three shades have shimmer and are fairly pigmented. There is a bit of fallout but I think that is mainly due to the shimmer particles. This is definitely a handy trio to have!
The NYX Round Lipsticks are great products because of their shade variety and texture, and I happened to get the shade Apollo. This is literally a shimmery copper. I can't say I would ever wear this shade alone- it made me look like I was sick- but I do imagine this looking gorgeous in the center of a red lip. Time for some experimentation!
The fourth product I received is the Starrily Nail Polish in Bzzz Bzzz. This is a black and gold chunky glitter with a clear base. I haven't really tried this polish yet because I'm not quite sure what color to pair it with- suggestions anyone?
Last product, and possibly my favorite, is a pair of Ardell Strip Lashes in 33. These lashes are very full all the way around and will look gorgeous with a deep smokey eye for those extra special occasions...I'm thinking New Year's! It almost looks as if they are two sets of lashes on top of each other and are pretty much the same length the full way around.
So if you couldn't tell through this post, I'm back to loving the Glam bag. We go through ups and downs but when it comes down to it, in the end I'll always know how I really feel about it. What did you get in your Glam bag? Let me know below!
Always stay happy and healthy! :) Tschüss, Katharina
Saturday, December 14, 2013
sample Saturday: Fekkai, Clinique, YSL
I'm bringing you another sample Saturday from some things I got through an Ulta order, black Friday and a friend. I don't know about you but I had to find some things to occupy myself with today since it is snowing outside- YAY! So you should be getting lots of posts coming up ;)
Starting with the Fekkai PrX Reparatives Conditioner, which claims to "transform dry, damaged hair into silky-soft locks with bounce" (taken off of packaging). I did like this conditioner. It has a vanilla scent to it and smoothes on nicely over the hair. Once you rinse it out, it does leave your hair feeling very soft, as well as when it is dried. I do imagine it doing well with damaged hair, however it is quite pricey and I personally feel that the Aussie Moist Conditioner does just as well.
A sample I got from going to Sephora on black Friday is the Clinique Moisture Surge Extended Thirst Relief. Upon application this had a gel like feeling, sort of like many of the primers. It gave my skin a very smooth finish and didn't look greasy or oily, which leads me to believe this is a water-based moisturizer. I did feel like I could put makeup on top of this without it breaking down, but at the same time I don't think it was as hydrating as its name claims. Although I generally have oily skin, I do like to use a very hydrating moisturizer at night to combat the possibility of dry patches and I honestly would not trust this product to do it. I would suggest this as a day to day moisturizer if you apply SPF over it, but not something that I would personally go out and get.
Lastly is a product that has been talked about in the beauty community for a long time- the Yves Saint Laurent Touche Eclat Radiant Touch. I got the shade 2 Luminous Ivory. This has a very light consistency and coverage concealer that can also be used to highlight all over the face. It can be built up a little bit to provide more coverage since it is so thin. I didn't notice it creasing on my and it did last all day without breakdown. If I ever decide to really splurge on a concealer, I really want to get this one because I really did like the effect it gave on my eyes and lately I have really been loving lesser coverage products that allow my skin to shine through. (In the picture- right- you can see the concealer applied to my left under-eye area, while the right has only foundation.)
I hope you stay warm and cozy under blankets if it is snowing by you, and if you have warm weather, then go enjoy it outside! Talk to you soon!
Always stay happy and healthy! :) Tschüss, Katharina
Wednesday, December 11, 2013
candied plums eye look
I wasn't planning on taking an almost two week hiatus, but the weather along with some personal things left me no time to blog- so I'm squeezing this in now since today NJ had some sunny weather. And because this weather was so dull lately, I wanted to do this colorful eye look that is a bit out of my comfort zone!
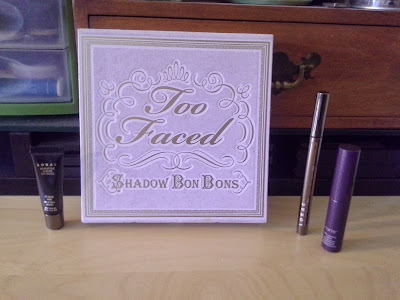
Like always, I started off this look by priming my eyes and I used the Lorac Behind the Scenes Eye Primer. This will make the shadows stand out more and keep them from creasing. As for shadows, I used the Too Faced Shadow Bon Bons Palette, but you can use any similar colors you have in your collection since it was a limited edition holiday palette from last year.
Starting off with a matte off-white, which is Vanilla in the palette, I put this in the inner corner of my eye and under the brow to highlight these areas. I didn't want this to be too stark because of the other colors I was using. Next I used the shade Cut the Cake, which is a matte lilac, and patted that all over the lid. I wanted this to be very concentrated so I layered this quite a bit. To give the crease some definition and a pop of color I used Candy Rose, a light pink with gold sparkles, in the crease. I wanted this to show through but not be obnoxious so I took this a bit higher in the crease and concentrated the color a bit more. Lastly, I took Framboise, a deep shimmery lilac, and patted that in to the outer-v and also took it up to the crease. This just gives your eye some more definition and completes the look. I also took this shade under the eye to line the lower lashes. To brighten that lilac color up a bit more, I went back in with Cut the Cake and patted that over the areas I had originally put it.
I then lined my eyes with the Lorac Front of the Line Pro and created a flick. I think this look would be really beautiful and more whimsical if you lined your upper lash line with a kohl liner and then blended it out with a black eye shadow...but I was running out of time! For my mascara, I used the Tarte Lights, Camera, Lashes- which I have been really liking, may I add.
Pink is not typically a color I go for in terms of shadows so I was surprised to see how well this look pulled together. I really like it! I think if you make the colors more intense this could look beautiful for a night out- I was just going to work and didn't want to overdo it!
I hope you enjoyed this look and I wish you much success recreating it! Comment with pictures, if you'd like! Talk to you soon.
Stay happy and healthy! :) Tschüss, Katharina
Subscribe to:
Posts (Atom)